
- The Coloured Bubble Cakery
- Cheltenham, Gloucestershire, United Kingdom
- Here at The Coloured Bubble Cakery all my cakes and cupcakes are lovingly hand baked and decorated to the highest standards and the tiniest of details. My blog is here to update you on my recent projects along with lots other exciting news about the Cakery. You can also follow the cakery on Twitter and Facebook for a more interactive way of staying up to date, if that's the way you roll. Cakes and Cupcakes are available to order for any occasion. Please feel free to contact me at thecolouredbubblecakery@gmail.com, through the contact me tab on Facebook or give me a call on 01242 698698, all enquiries are welcome, Rachel at The Coloured Bubble Cakery :) x NEW WEBSITE COMING SOON!!
Monday 7 April 2014
'Good Times' Photo Cupcakes
I put these together to celebrate my mate Steve's birthday.
It was all a bit of a rush but with that considered, they went down a treat and Steve was really touched.
Working with party photos from the last year or so, and capturing some of Steve's more memorable moments they were ooh'd and ahh'd over and brought back sketchy yet happy memories of past events!!


Thursday 6 March 2014
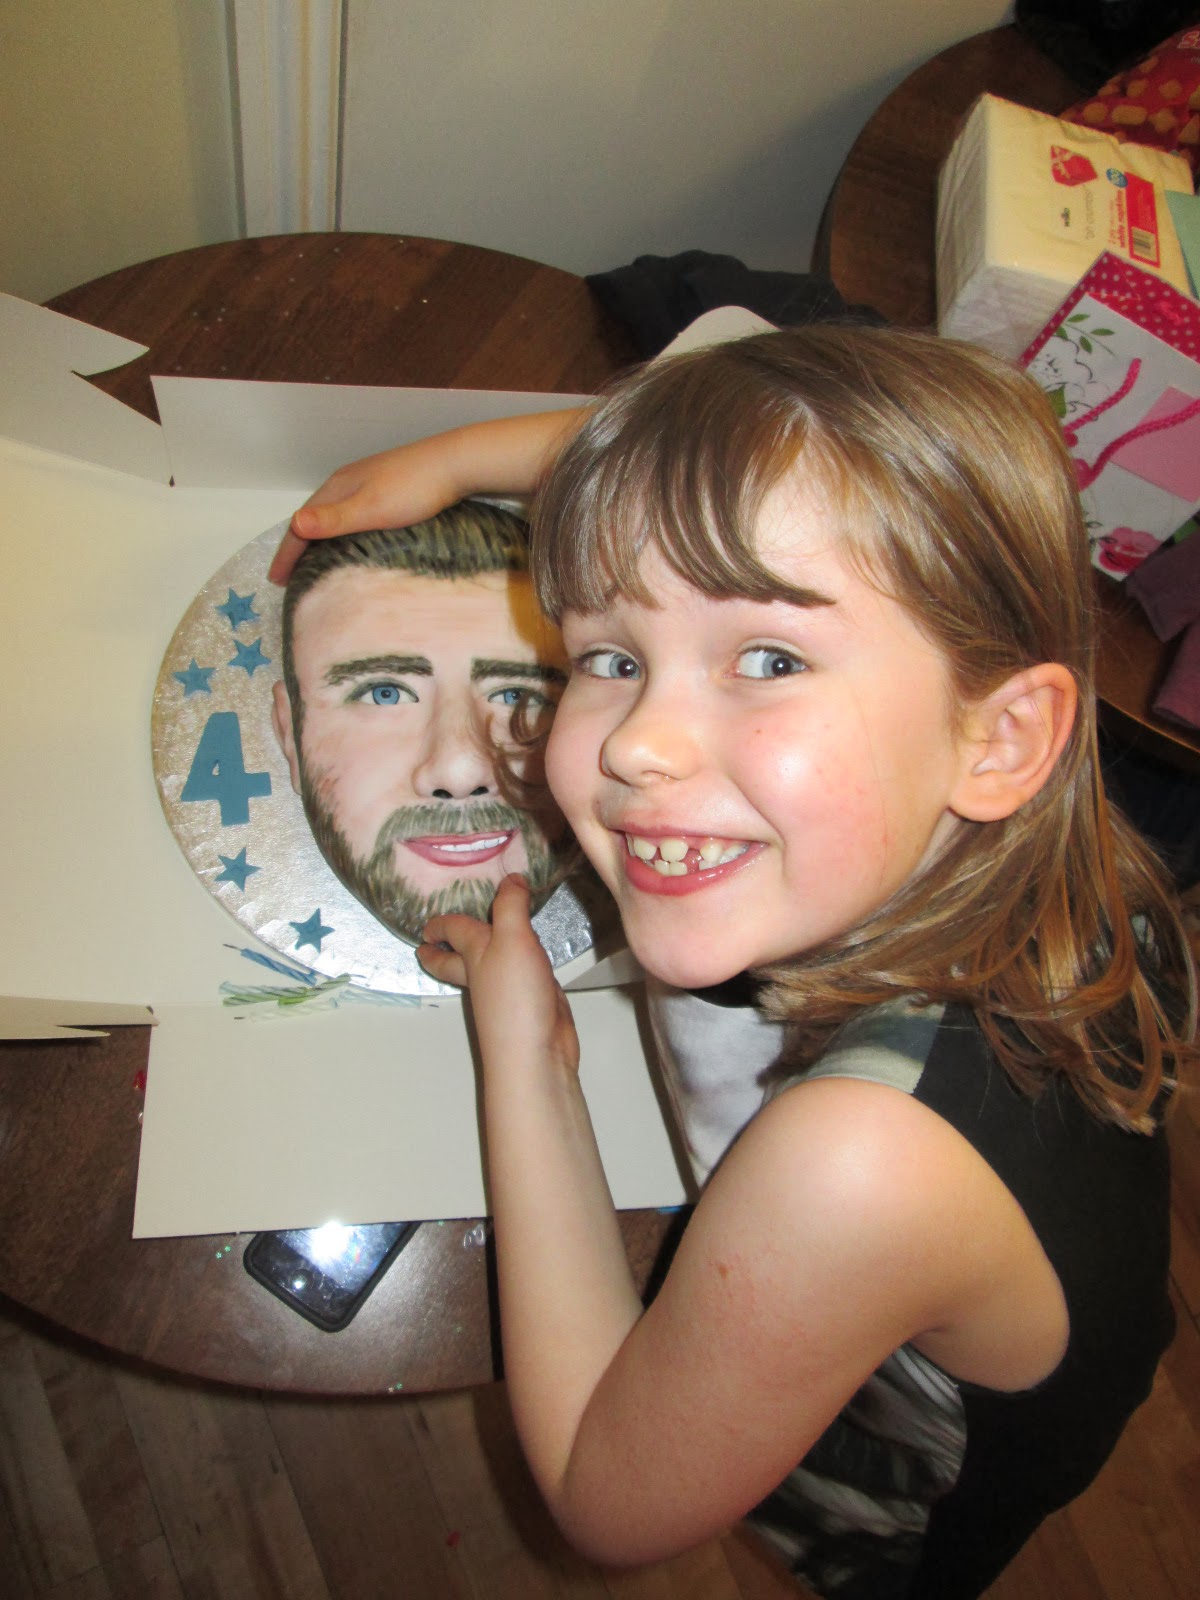
Gary Barlow Cake
I made this cake for one of my nearest and dearests 40th. She is a massive Gary Barlow fan so I thought I'd have a go at fashioning him out of cake for her.
I didn't have a huge amount of time to do him justice, or at least that's my excuse!
Although I don't think it resembles Gary all that much (in fact looks more like my friend Jack who looks like Gary if that makes sense!) Nicki knew immediately who this friendly face was trying to be and reacted accordingly.
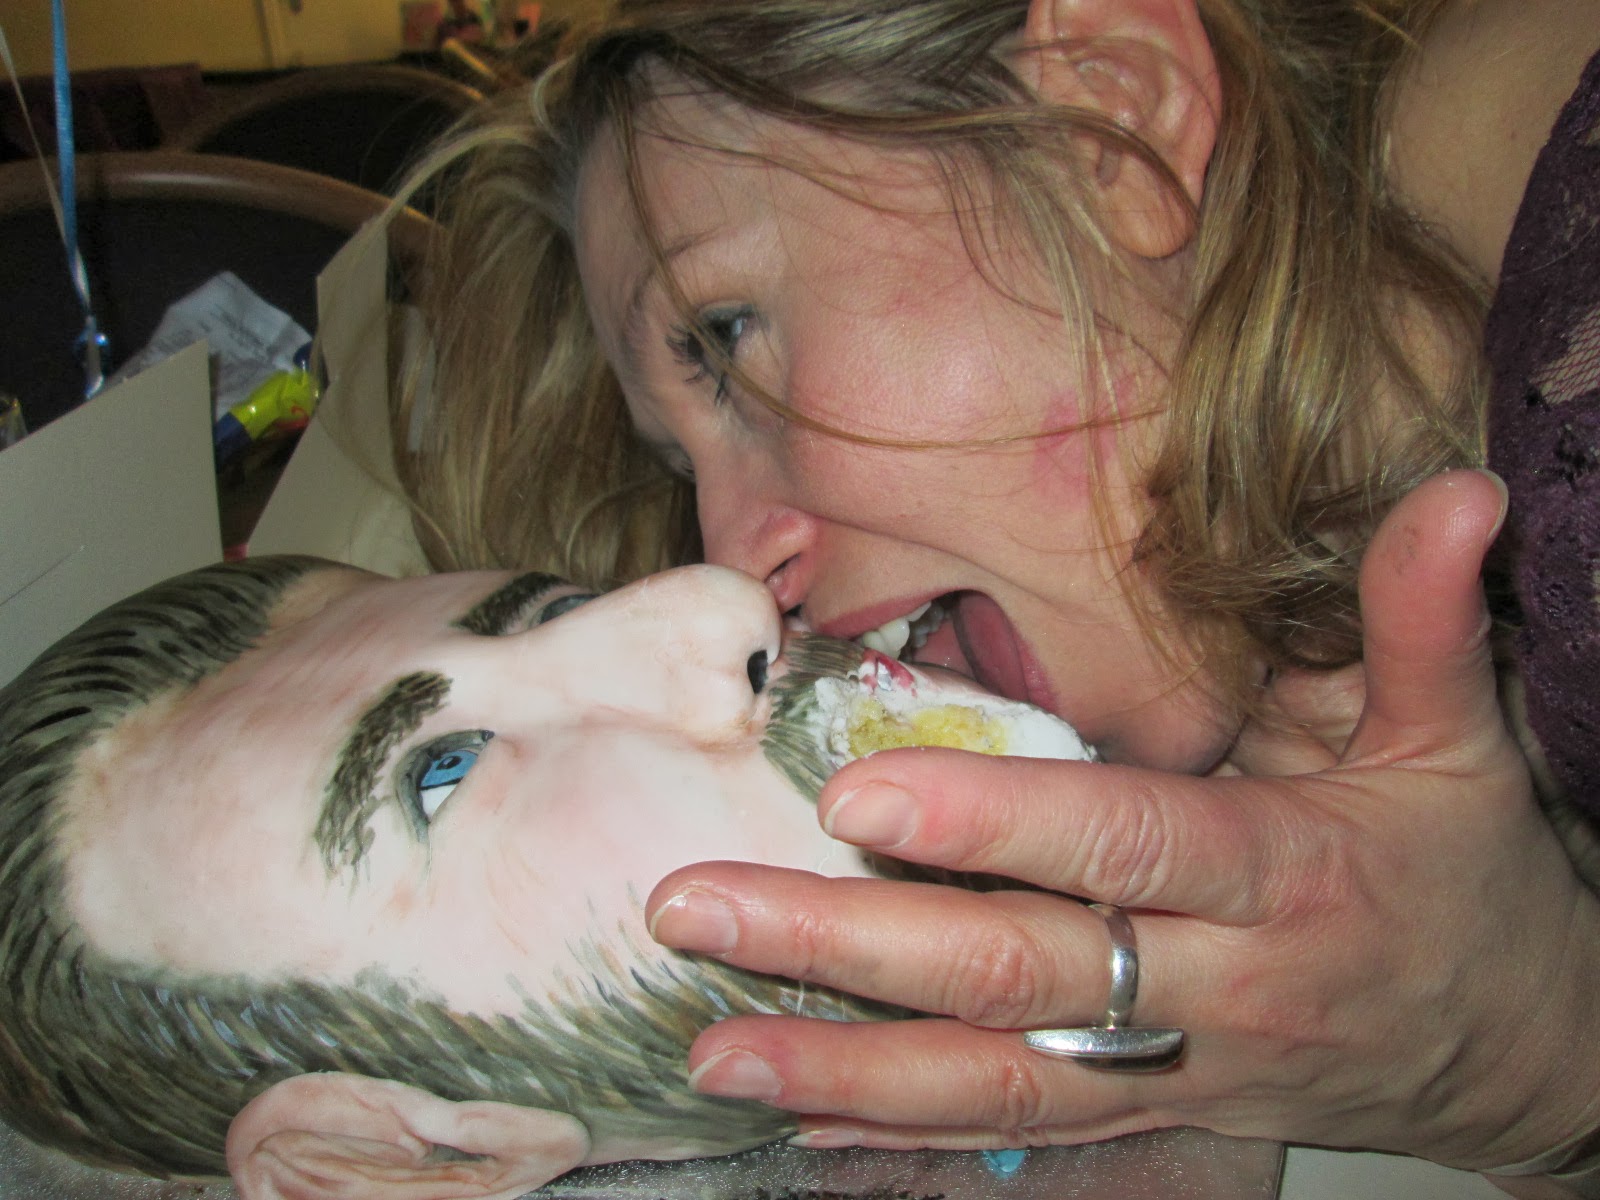
I made him out of Lemon Drizzle cake as it's a favourite of mine and is always a pleasure to make properly with real lemon juice and plenty of it, something that shop bought cakes just can't touch.
We feasted appropriately, with Nicki taking the initial bite... Here's Gary in all his glory...

Just a couple of snaps of the process...


and some from the party night itself... the adults being a little bit worse for wear by the time the cake came out, please don't judge us! :)

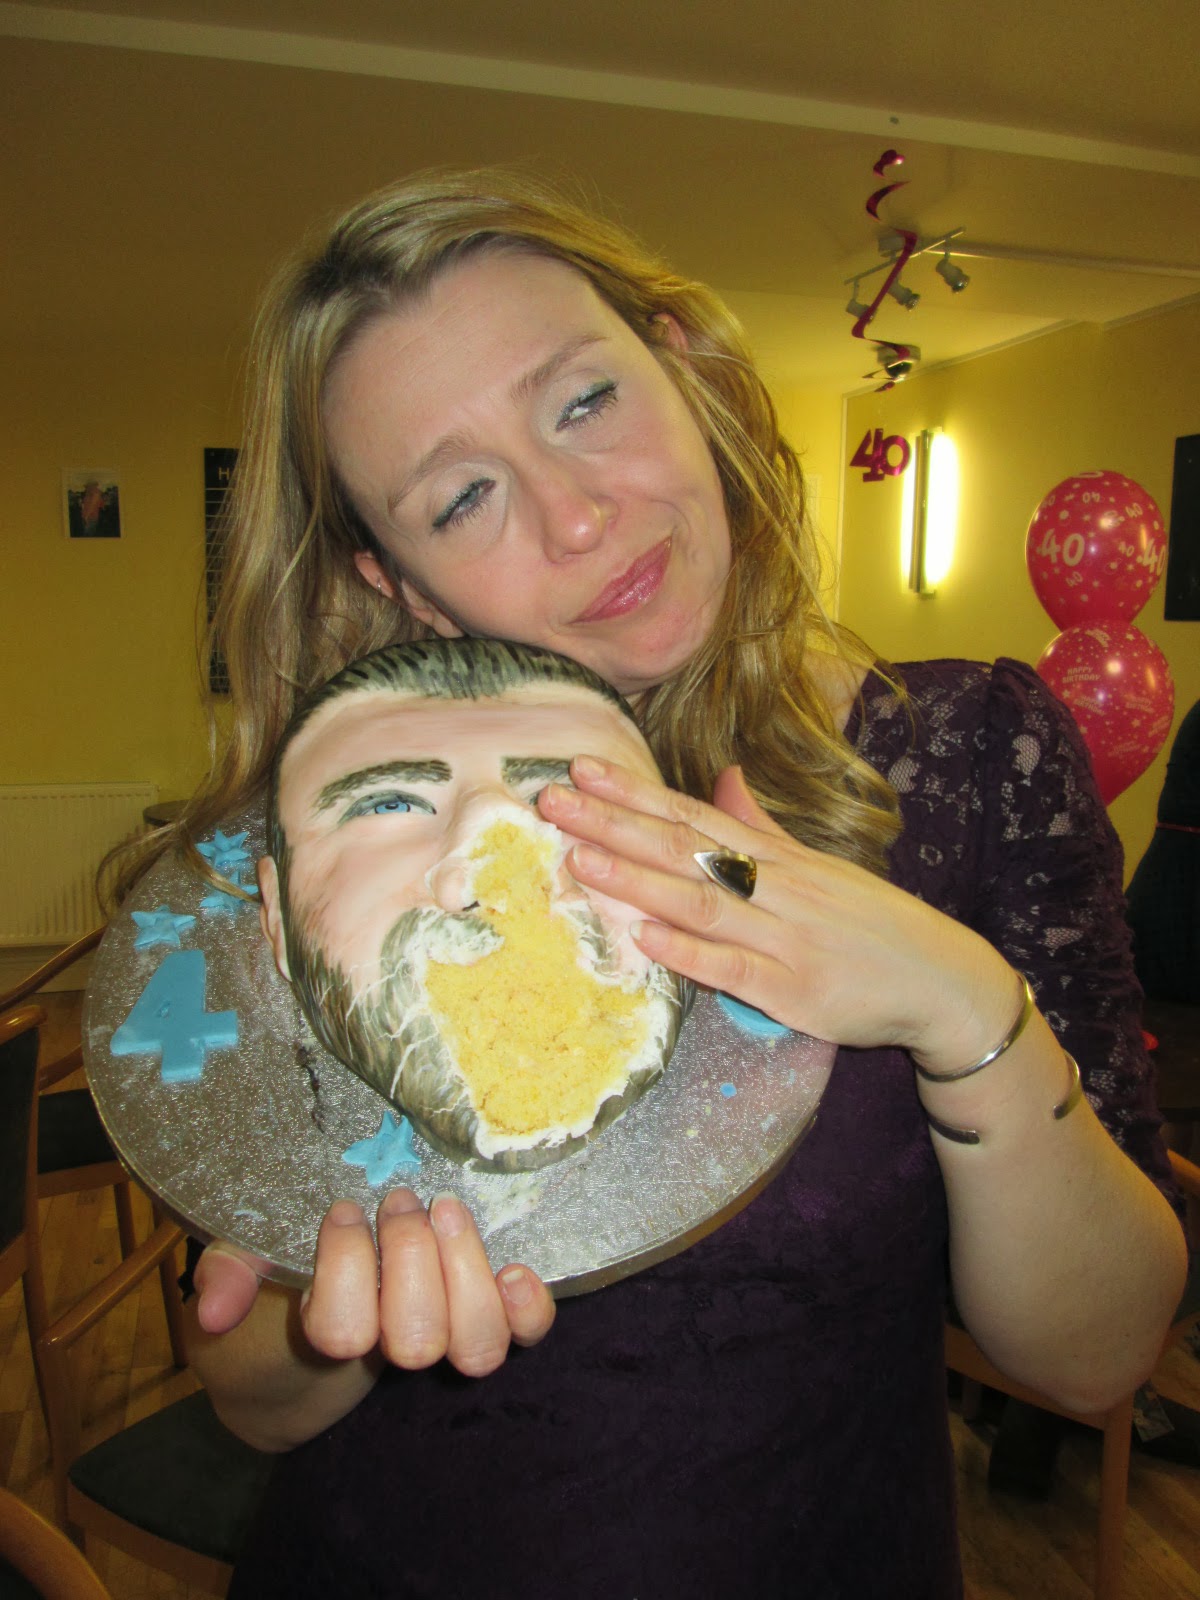
HAPPY 40th LOVELY NICKI!!!


Subscribe to:
Posts (Atom)